3. The Welcome Window and the Samples
A tour of the Welcome window, the six included samples, and the hidden framework test suite.
3.1 A tour of the window, top to bottom
The Welcome window opens automatically once per package version, right after import. You can reopen it any time from Tools > Common Game System > Welcome or Window > Common Game System > Welcome.
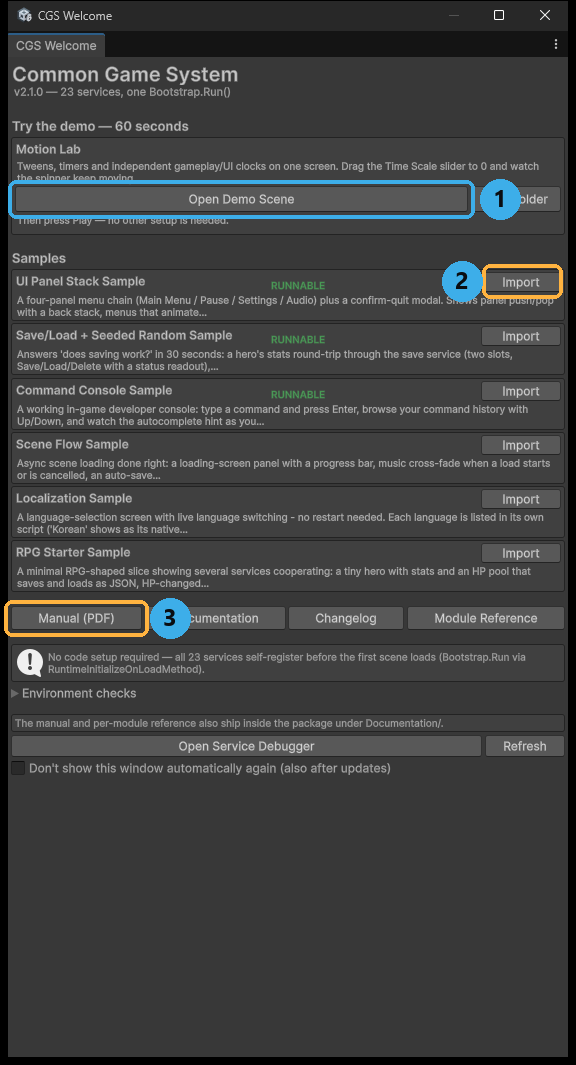
The Welcome window with its five sections labeled top to bottom: demo, samples, quick links, environment checks, and the footer row with the tests import and Service Debugger buttons.
From top to bottom, the window contains:
- Try the demo — 60 seconds. A single Open Demo Scene button that loads Motion Lab (chapter 2). Start here if you skipped the demo.
- Samples. Six rows, one per sample, each with a one-click import button. Section 3.2 explains what each sample teaches.
- Quick links. Four buttons: Manual (PDF) — this document; Documentation — the docs folder in your project; Changelog — what changed in each version; Module Reference — the per-service reference pages.
- "No code setup required" — a note confirming that all 23 services self-register before your scripts run, followed by a collapsed Environment checks foldout. Expand it to verify your project setup, such as which optional Unity packages are present. On a default project everything shows green, which is why it starts collapsed.
- Footer. Three controls: Import framework tests (section 3.4), Open Service Debugger — an editor window that lists every registered service and its current implementation while you play — and a "Don't show again" toggle that stops the auto-open for this package version.
3.2 The six samples
Samples are small, self-contained lesson projects. Three are runnable: import, open the scene, press Play. Three are script templates: commented starting-point scripts with a step-by-step README, meant to be read and adapted rather than played.
| Sample | Type | What it teaches |
|---|---|---|
| UI Panel Stack Sample | Runnable — SampleScene.unity | A four-panel menu chain (Main Menu, Pause, Settings, Audio) plus a confirm dialog. Shows panel push and pop, and how gamepad and keyboard focus follow the top panel. |
| Save/Load + Seeded Random Sample | Runnable — SaveLoadDemo.unity | Answers "does saving actually work?" in 30 seconds. A hero's stats round-trip through a save file, and seeded random numbers reproduce the same rolls after loading. |
| Command Console Sample | Runnable — CommandConsole.unity | A working in-game developer console built on the command registry: type a command, press Enter, browse history. Use it as the starting point for your own console. |
| Scene Flow Sample | Script template + step-by-step README | Async scene loading done right: a loading screen with a progress bar and cancellation. The README walks you through wiring it to your own scenes. |
| Localization Sample | Script template | A language-selection screen with live language switching — no restart. Shows how display text is looked up by key. |
| RPG Starter Sample | Script template | A minimal RPG-shaped slice with several services cooperating: a small hero using saving, events, random rolls, and timers together. The best sample for seeing the big picture. |
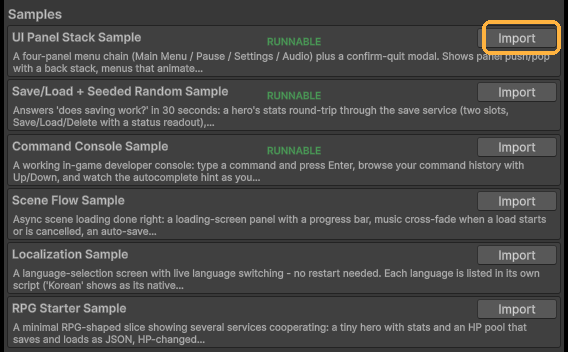
The Samples section of the Welcome window. The highlight marks one import button and the label showing whether that sample is runnable or a script template.
A good first path: play the Save/Load + Seeded Random Sample, then read the RPG Starter Sample scripts once you have written your first service calls (chapter 4).
3.3 Where sample files land
Importing a sample copies its files into your project at:
Assets/Samples/Common Game System/<version>/<sample name>/
The copies belong to you. Edit them, rename them, or delete the whole folder — the original stays inside the package, and you can re-import a fresh copy from the Welcome window at any time. Nothing in the framework references the imported copies, so removing them never breaks anything.
3.4 The framework tests (hidden until you want them)
CGS is verified by 2,600+ automated tests. They ship inside the package, but hidden — they do not appear in your Project window and add nothing to your compile times or builds. Most users never need them.
If you want proof the framework behaves on your machine and Unity version, click Import framework tests in the Welcome window footer. This copies the test suite into your project. Then open Window > General > Test Runner, select the EditMode tab, and click Run All. The full suite runs in a few minutes and should finish with zero failures.
Where the tests appear: after the one-click import, open Window > General > Test Runner and select the EditMode tab. The CGS suite is listed as
CommonGameSystem.Tests.EditMode.dll; click Run All and expect zero failures.
Why hidden by default? Tests are developer tooling, not game content. Shipping them visible would double the apparent size of the package in your Project window and slow every script compile. Hiding them, with a one-click opt-in, gives you verification without the clutter. Like the samples, imported tests are plain copies — delete them whenever you are done.
Next: 4. Your First Script